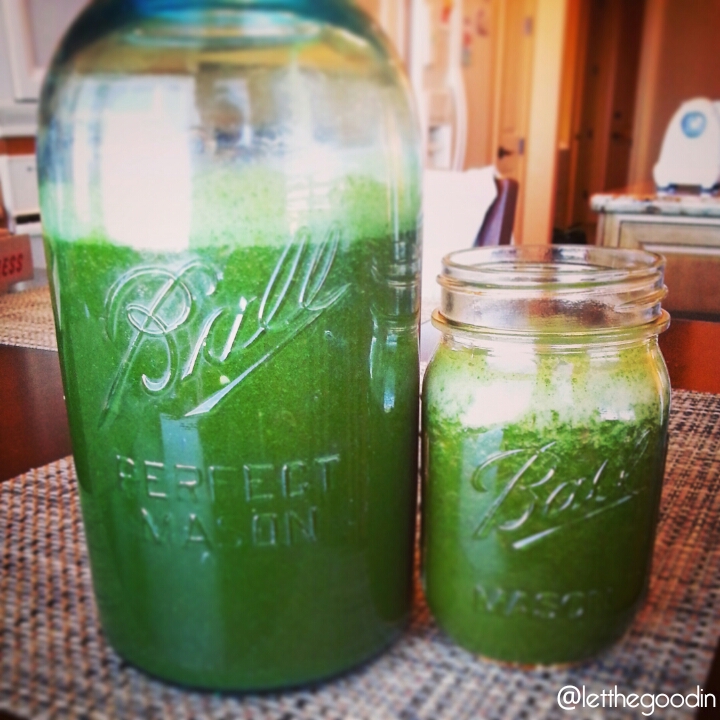
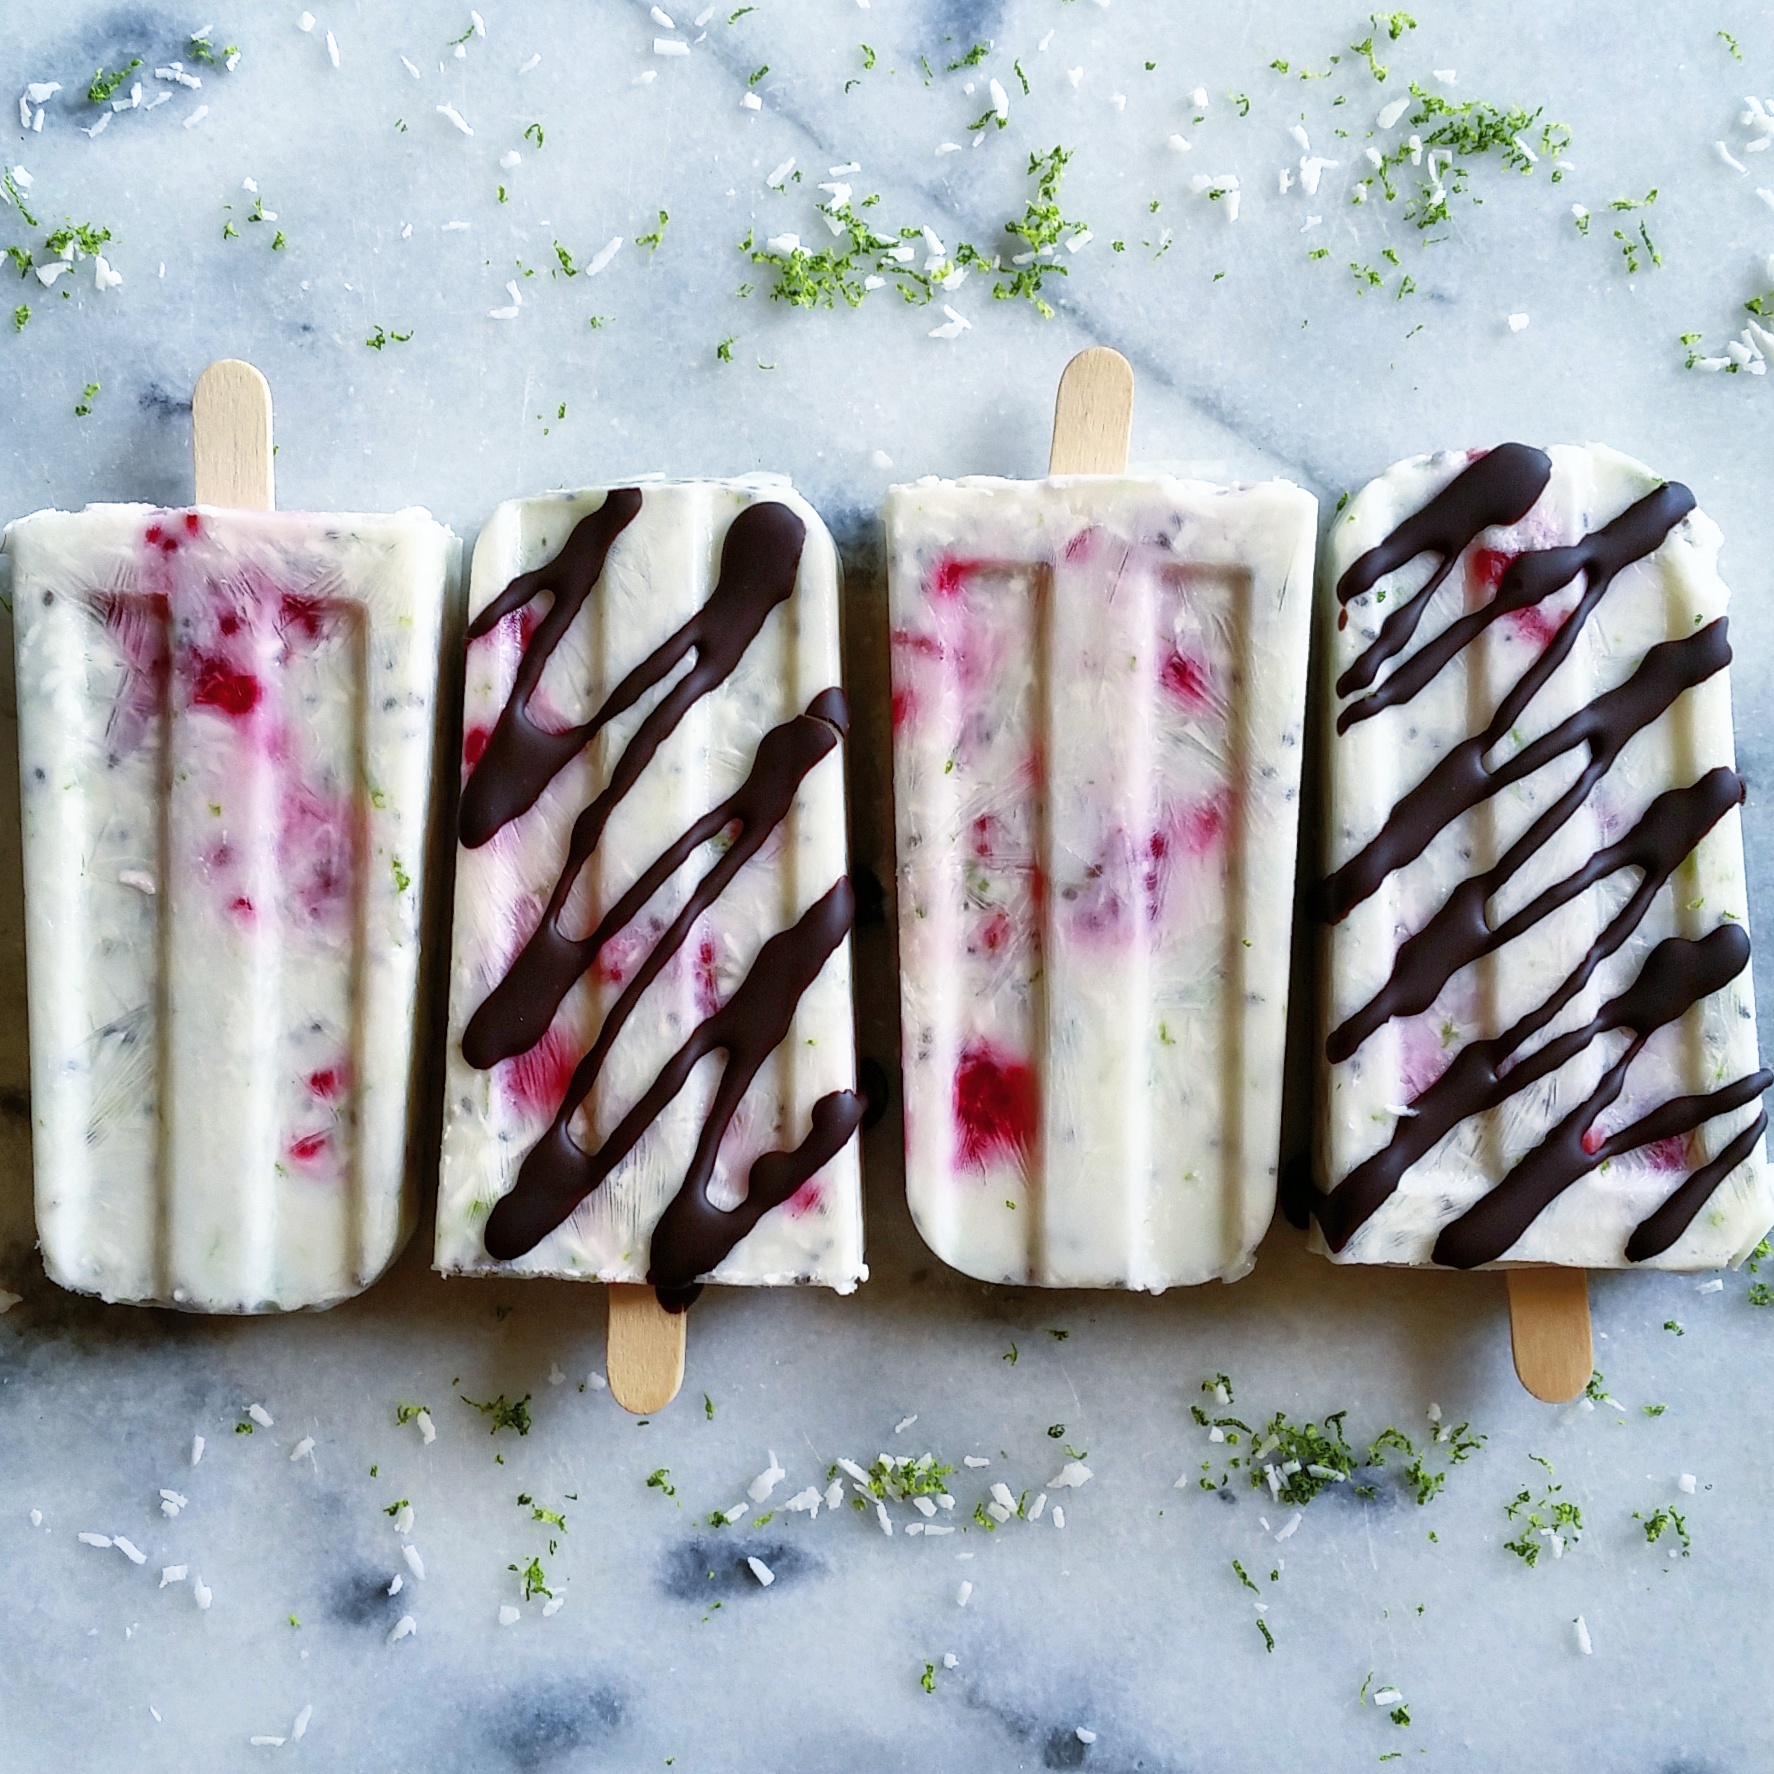
Recipe: Berry Banana Superfood Sorbet Bowl

DIY Whole Grain Dijon Mustard

And now for DIY recipe numero uno.I lurve mustard. All kinds, and the spicier the better. The kind of spice/heat from mustard seeds is one of my favorites - similar to wasabi - I love that sinus-clearing, head rush of heat versus a mouth-scalding burn (which I used to not be able to tolerate at all, but have actually come to love flavorful hot peppers that do that too!). Grocery store chains and local markets usually have a great variety of mustards to buy, but when browsing the spice aisle of the new-ish Natural Grocers store here in Prescott, spotting yellow and brown mustard seeds at a crazy low price made a lightbulb go off over my head... make mustard from scratch!So simple, so worth it. This is a super basic recipe. So much so that I am not sure if this even meets true "recipe" qualifications - it's that minimalistic. I played around with ingredient ratios, and this seemed to balance out the best. The mustard is spiciest right after the preparation process is complete, and I know the spice factor can mellow out over time... but just wait and see if you can make the mustard last long enough to get to that point (we haven't). A good, grainy dijon mustard is such a great, multi-purpose kitchen staple - mix it into vinaigrettes, use it as a marinade, spread it on sandwiches, dip veggies and pretzels into it (highly recommend Trader Joe's pumpernickle variety) - you'll use it up in no time. Make some and keep it for yourself, and make extra to give as a gift for a mustard-loving pal.Homemade pretty much always wins, and certainly when it comes to a whole grain dijon mustard, homemade / DIY takes the cake!Recipe: DIY Whole Grain Dijon MustardWhat You Need:

  • 1/2 c dry white wine
  • 1/2 c good white wine vinegar
  • 1/4 c brown mustard seeds
  • 1/4 c yellow mustard seeds
  • a few grinds of black pepper
  • 1/2-1 tsp salt

What You Do:

  • Mix all ingredients in a small jar or bowl
  • Cover container with plastic wrap to seal
  • Let covered container sit on your counter (not in direct sunlight) for 2 days - you'll notice that the seeds will absorb the liquid
  • Pour mixture into a small food processor, and grind/blend to desired texture - leaving some grainy-ness is best!
  • Store in an airtight container in the refrigerator (I think it should keep for at least a few weeks)


Tomato, Green Olive & Spinach Dip

On a recent trip to Costco (with enough hunting around, there are indeed organic and clean-ingredient products to be found there!), there was a sale on Baba Foods hummus. We tasted and enjoyed many and bought three: sun-dried tomato and basil, spicy black bean, and garlic and artichoke. YUM. A nice way to switch things up with typical store-bought hummus flavors.Wanting something on the lighter side for dinner last night - and having these three tubs of hummus to go through - I figured I'd try and add some veggies to bulk the hummus up in a healthy way. What I wound up with is one of those "refrigerator/pantry recipes" - where I didn't plan ahead at all, but instead took a look at what ingredients were already in our kitchen and picked out a few that sounded like a good combination. With some fresh veggies, garlic, a touch of olive oil and a food processor, you really can't go wrong mixing together just about any combination of ingredients! And it takes all of 5 minutes. Quick, delicious andsuper healthy. Gotta love the food processor (I used a mini one) as a time saver!After preparing the tomato, olive and spinach dip, I thought it would go well with the sun-dried tomato and basil hummus. So into a bowl went the hummus, and I made a little well in the center into which I scooped the dip. We ate it by dipping in griddle pan-warmed za'atar pita (by Kermanig Bakery - another recent and great Costco find) slices.This dip works well on its own, and did exactly what I was hoping for in terms of bulking up the hummus with some quality, healthy veggies. In combination with the hummus, it's a nutritionally well-balanced dish - great for a snack, appetizer or light meal.Recipe: Tomato, Olive & Spinach DipNote: I didn't measure exact amounts when making this, but it shouldn't be a problem, as slight variations on the ratio of ingredients won't have a negative impact!What You Need

  • 1 c cherry/grape tomatoes (any color)
  • 10 medium green pimento olives
  • 1 c loosely packed spinach
  • 1/2 garlic clove
  • pinch sea salt (or any other salt will do)
  • a few grinds of fresh black pepper
  • 1/2 tbsp olive oil, divided in half
  • 5 large basil leaves (optional)
  • 1-in chunk of a fresh jalapeno (optional)

What You Do

  • Add garlic to food processor and pulse to chop
  • Add tomatoes and pulse to chop
  • Add all other ingredients (minus 1/4 tbsp olive oil) and pulse, chopping to desired consistency
  • Scoop into desired serving dish - over hummus or by itself - and drizzle the remaining olive oil over the top
  • Serve with warmed pita or whatever you want to dip in it, and enjoy!


How to Juice Wheatgrass Without a Juicer

I spotted a small container of wheatgrass - which I love - amidst sprouts and herbs at New Frontiers recently, and curiosity got the better of me so I grabbed it to try preparing the juice at home for the first time. I initially thought we'd use the juicer, but another experiment with that machine recently left enough to be desired that I decided to instead tackle the wheatgrass with a blender and fine mesh strainer.Turns out you don't need a fancy juicer or special wheatgrass juicer to make your own wheatgrass shots; a high powered blender will do the trick as well. Granted I did have to use a little water, so the juice was a little more diluted than usual, but it still had its trademark refreshing, sweetly grassy taste.How to Juice Wheatgrass Without a JuicerThe container of wheatgrass I bought was about 5 x 5 inches and filled with rooted wheat grass. I cut the green grass portion off and put it into my blender (a Blendtec). I then added  few ounces of cold water - enough to just cover the flat part of the blender blades. I pressed the juice setting button, and let the Blendtec go to town! Once it was done, I placed a small fine mesh strainer/sieve over a Pyrex measuring cup (you can replace this with just about any cup or bowl) and poured the juiced wheatgrass through the strainer, using a spoon to press down and extract as much liquid as possible. Very little was left in the strainer aside from a bit of thin pulp and some foam. I then poured the wheatgrass juice into two small glasses (see photo - that's a teaspoon in front of the mini glass to help show how small the glass is), and we drank away!As I said, the addition of water to this makes for a wheatgrass juice not quite as concentrated as what an actual juicer would produce, but that didn't bother us; it was a very enjoyable and delicious morning treat to have this at home!Why wheatgrass? Read more about the potent benefits of this powerful detoxifier at the Hippocrates Institute.

Recipe: Vegan Strawberry Rhubarb "Cheesecake"

The creamy richness of cheesecake with healthy fats, less sugar and raw, vegan ingredients? Why not!I still have some researching and experimenting to do to perfect this, but I think it's a pretty solid recipe. I love rhubarb and strawberries - separate or together - so when I first spotted seasonal rhubarb at the local market earlier this month, looking so vibrant and beautiful, I had to grab some. I've had strawberries on real cheesecake before, so I thought making a strawberry rhubarb compote to top on a vegan "cheese"cake might be a nice complement of flavors and textures.This is one of those vegan foods where you can't go in expecting an exact replica of regular cheesecake. Not gonna happen. But, if you want something cheesecake-like that has a leg up on the "real" thing in terms of nutritional value (note though that this is not a "health food" per say and is not low calorie - though as with anything, you can control caloric intake based on how you portion) and also tastes great, then I highly suggest giving this recipe a try.Keep on reading for the recipe!Recipe: Vegan Strawberry Rhubarb "Cheesecake"What You NeedFor the crust:

  • 1/3 c nuts (I used a mix of macadamia and almond)
  • 3-4 dried dates
  • 1/4 tsp vanilla bean paste (or 1/2 tsp vanilla extract)
  • 1/3 c unsweetened coconut
  • 1/2 tbsp water

For the filling:

  • 1 c soaked raw cashews (soak for 4-6 hours, then drain)
  • 1/2 c coconut cream*
  • 2 tbsp fresh lemon juice
  • 1/2 tsp vanilla bean paste (or 1 tsp vanilla extract)
  • 1/4 c + 2 tbsp honey (to taste)

For the compote topping:

  • 4 stalks of fresh rhubarb, cut into 1-inch pieces
  • 1 pint strawberries, sliced
  • zest and juice of 1/2 an orange
  • 1-4 tbsp honey and/or turbinado (to taste)
  • 1-3 tbsp water (optional, for consistency)

For assembly/serving:

  • 3-4 small glass jars, tupperware, or other container(s) of your choice for the"cheese"cake (you can make this into individual portions or one larger serving)

What You Do

  • To make the crust, process all ingredients - minus the dates - in a food processor or powerful blender, until the consistency only has small crumbs (I didn't grind mine up enough to my liking - will blend more next time). Add dates, and process until mix looks evenly combined. Press "dough" into bottom(s) of container(s) from which you'll serve.
  • To make the filling, blend all ingredients until smooth. Taste to make sure no adjusting is needed (more lemon? sweetener? vanilla?). Spoon into serving container(s) over crust.
  • Refrigerate or freeze until the "cheesecake" sets and firms.
  • To make the strawberry rhubarb compote - which should be done in advance so it has time to cool before cheesecake assembly - put rhubarb pieces in a small/medium saucepan over medium heat, stirring. As they begin to heat through and soften, add strawberries. Once the fruit begins to soften and combine a bit - the rhubarb will start falling apart - add orange zest and juice and sweetener. Keep stirring, and taste as you go in case adjustments are needed. Simmer for about 20 minutes, and then remove from heat, cool slightly, and then cool completely in refrigerator.
  • Once the "cheesecakes" are firm, spoon cooled compote on top and store in refrigerator until you're ready to serve!

*Note: To get coconut cream, put a can (or more) of coconut milk (organic if possible -though that won't impact how this turns out!) in the refrigerator for a few hours. Make sure not to shake it up. Once the can is cold, remove and open with a can opener. You'll find "coconut cream" at the top of the can - scoop it out with a spoon - with a thinner liquid beneath it. Chilling the can in the fridge is an easy method of separating the coconut milk into two very different viscosities/consistencies, which can be helpful for recipes, such as this, that require only one or the other.

Recipe: Raspberry Banana Fruit Leather

Fruit Roll-Ups were a childhood sweet staple for me (my favorite non-healthy - though still HFCS-free - brand is Joray), but as my tastes and taste for healthier alternatives evolved, I learned to instead reach for fruit leather - like Stretch Island Organic - or other similar store-bought products that only have fruit and natural fruit juice as ingredients.But like just about anything else, homemade trumps store-bought - you have complete control over ingredients and taste - and this rule definitely applies to fruit leather. I recently attempted a first stab at making it, so I have some fine-tuning to do - and will post updated recipes in the future - but for now, this seems to be a good basic recipe to build off of.I used a dehydrator, but an oven at a low temp also works fine.We had a little cheesy laugh when I first cut into the prepared and cooled fruit leather - I inadvertently made it into a "C", the first letter of my fiance's last name (and my last-name-t0-be)... or Pac Man, depending on how you look at it...:So I continued slicing wedges:And finally rolled the slices up and placed them in a jar for easy grabbing!:Raspberry Banana Fruit LeatherWhat You Need

  • 1 pint of fresh raspberries
  • 1/2 ripe banana
  • 1/4 tsp vanilla bean paste (optional)
  • 1/2 tsp coconut oil

What You Do

  • Using your fingers, coat the puree/liquid sheet of your dehydrator with a very thin film of coconut oil. If you don't have a dehydrator, line a small baking sheet with tin foil, then parchment paper, and lightly grease that with the oil.
  • In a blender (Blendtec or VitaMix is preferable, for their power), puree the raspberries, banana and vanilla for at least 2 minutes. I left the raspberry seeds in (vs. straining them out) because they contain important nutrients. With a powerful enough blender, the seeds will also be pulverized (I learned my lesson and will blend the mix a bit longer next time).
  • Pour the puree on your dehydrator or baking sheet and spread out evenly with a spatula.
  • Turn the dehydrator (or oven) temperature to 115 degrees. The dehydration process will take longer at this temperature than a higher one, but it will prevent all of the good fruit enzymes from being killed off.
  • Dehydrate for about 12 hours. About 10 hours in, I tested mine and noticed that it was solid and formed, but the underside was still a little mushy. So, I flipped the fruit leather sheet over and continued the process for another two hours or so, and everything dried out evenly.
  • When done, remove and let the fruit leather cool completely on a piece of parchment paper before you cut it.
  • Slice as you like, roll up and eat to your heart's desire! I'd say if you don't finish eating your batch within 2 days, refrigeration is a good idea.


Recipe: Vegan Pesto

Garlic and basil are two of my favorite flavors - so pesto is a no-brainer. If you tasted this without knowing the ingredients, you may be like me in that unless you were told, you wouldn't even realize what "traditional" pesto ingredient isn't present: parmesan. So - this is a vegan pesto recipe, as richly flavorful and robust as any other!Recipe: Vegan PestoWhat You Need

  • 2 1/2 cups of loosely packed fresh basil leaves
  • 1/4- 1/2 cup shelled walnuts (use more or less based on whatever you like - might take a few tries to perfect to your preferences)
  • 2 cloves garlic
  • 1/4-1/2 cup olive oil
  • salt & pepper to taste

What You Do

  • Process basil, walnuts, garlic, salt and pepper in food processor until coarsely ground and moist
  • Add in oil in 2-3 tbsp increments, pulsing to combine each addition, until consistency is creamy and only slightly textured
  • Store in refrigerator in an airtight container for 2-3 days (you can drizzle some olive oil on top to help prevent discoloration); freeze to preserve longer